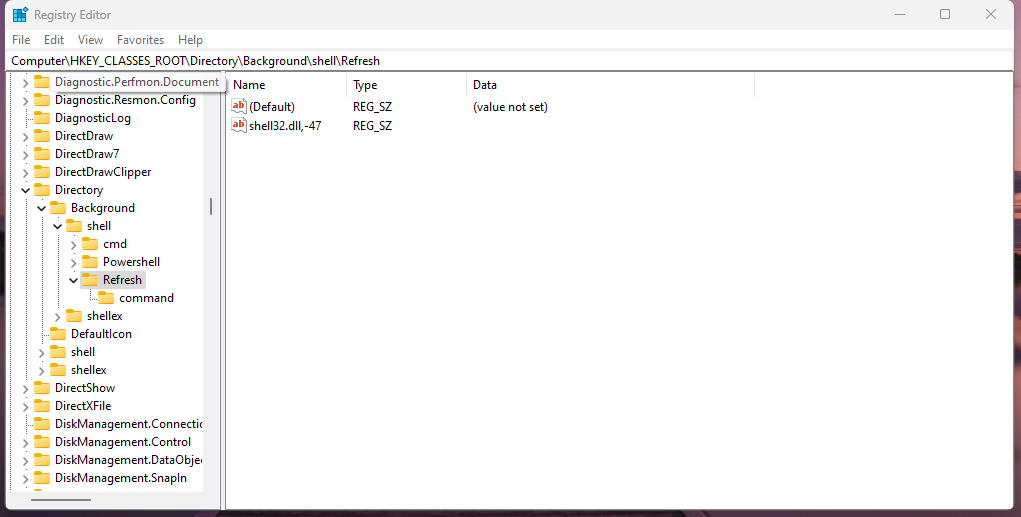
If you are running Windows then you must have noticed that when you right-click on your Windows desktop, you see an option called Refresh in the context menu. However, Microsoft has discontinued this option beginning with Windows 11. But fear not! This blog post will guide you through the process of adding a refresh option to your context menu in Windows 11.
Disclaimer: Editing the registry is a sensitive task and should be done with caution. Incorrect changes to the registry can cause serious system issues. Proceed at your own risk, and follow the steps carefully.
- Press
Win + Rto open the Run dialog, typeregedit, and press Enter to open the Registry Editor. - Navigate to the following key:
HKEY_CLASSES_ROOT\Directory\Background\shell
- Right-click on the “shell” key, choose
New, and then selectKey. Name the new key as “Refresh” (without quotes). - With the “Refresh” key selected, right-click on the right side of the Registry Editor, choose
New, and then selectString Value. Name the new string value as “Icon,” and set its value to “shell32.dll,-47” (without quotes). - Right-click again in the right pane, choose
New, and then selectKey. Name this new key as “command.” - Select the “command” key, and in the right pane, double-click on the
(Default)string value. Set its value to:
%SystemRoot%\explorer.exe shell:::{BDEADE7F-C265-11D0-BCED-00A0C90AB50F} -verb Refres

- Close the Registry Editor.
After completing these steps, you should now have a Refresh option in the context menu when you right-click on the desktop or a folder in Windows 11.
If you want to know what exactly the Refresh button does in Windows, then this blog post might be helpful for you!


